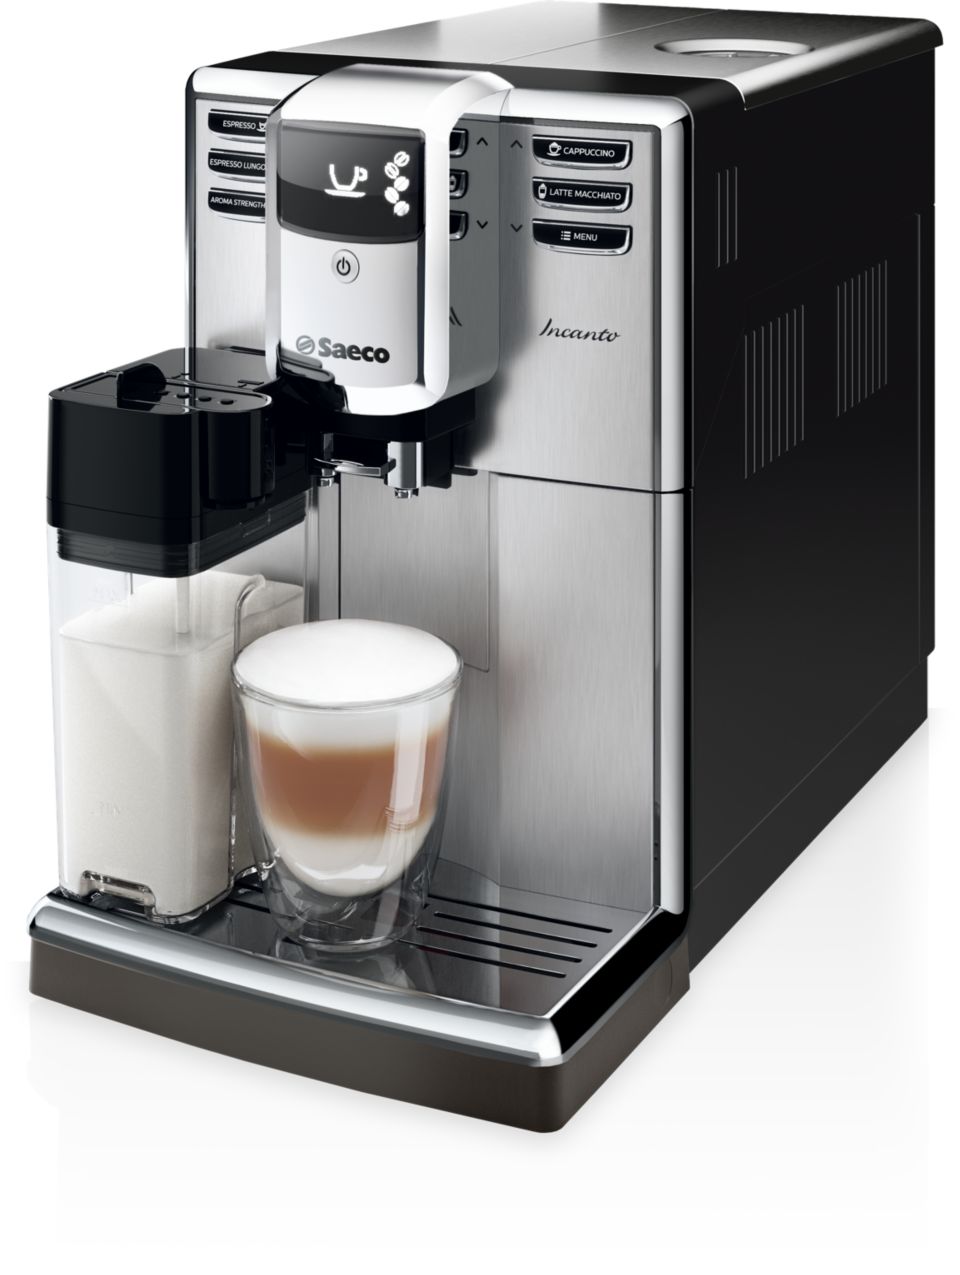
The coffee machine, a Saeco Incanto HD8917/01 worked diligently for 10 years, and a few days ago it decided to display an odd behavior: Whenever it was requested to produce some bean squeezings, it’d shut off. It’d start normally, you could browse the menu — but the moment it started to do some work, it shut off.
At first, I expected some sort of jam — in my mind, a jammed electric motor could draw so much current that the voltage drop could cause the IC to reboot. I removed the brewing unit, gave it a thorough cleaning and lubricating — but same result.
Alright, I thought — my train of thought couldn’t have been that far off. Maybe after 10 years, one of the capacitors went bad, resulting in the same problem? It was not having the capacity it needs to supply the high current when starting the heating coil and the motors? That meant, however — I needed to open that thing up. Completely.
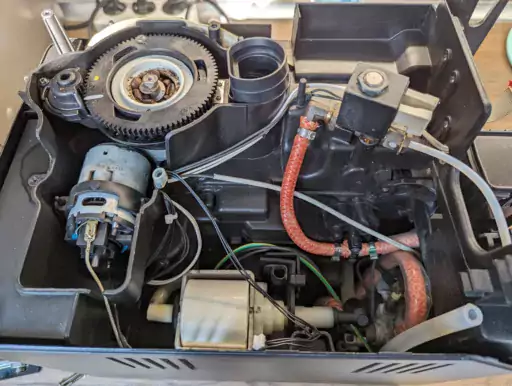
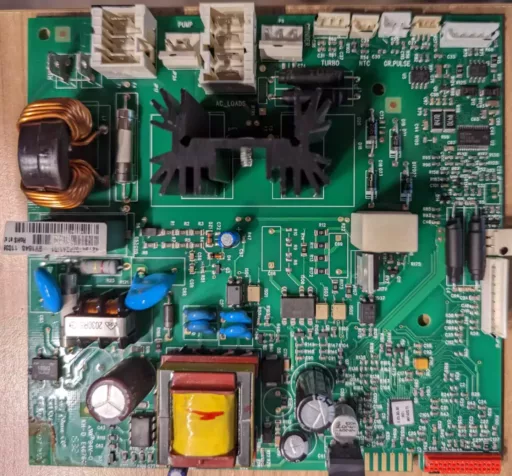
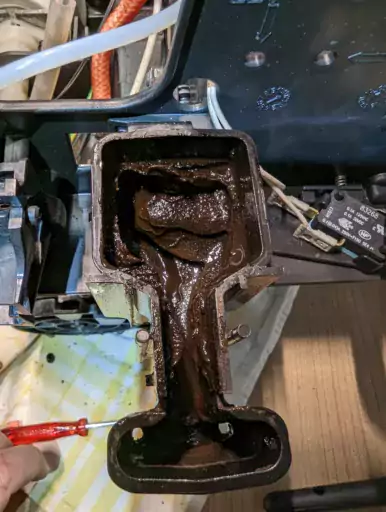
Sadly, I couldn’t find a useful diagram of the machine, and didn’t think of looking on YouTube. So I did the usual approach — remove a screw or two, see what came loose and try to remove that, rinse and repeat. After some cursing, I did manage to free the guts from its case. And viola — aside from some rather gross unseen remains that regular cleaning couldn’t ever have reached — the power supply had a rather nasty looking burn mark.
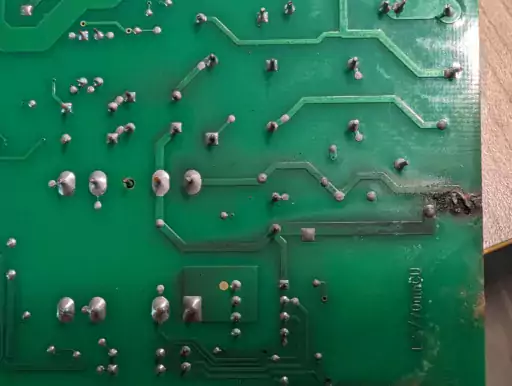
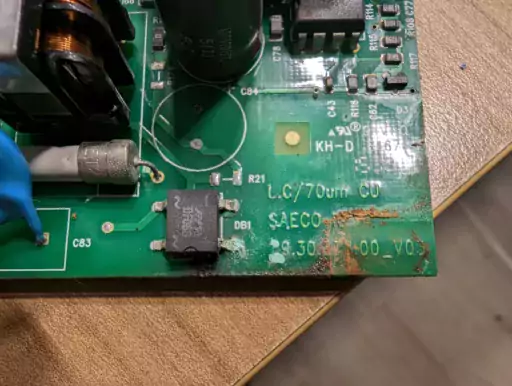
The rectifier in question is an Onsemi DF08S 1.5A Bridge Rectifier. What appears to have happened is that some water got into the power supply and shorted the DC side of the rectifier against ground. A short on the AC side likely would’ve caused a big kaboom, but the 1.5A current limit of the rectifier probably allowed for a slow burn. You can get replacement rectifiers fairly cheaply at your source of choice.
The Repair
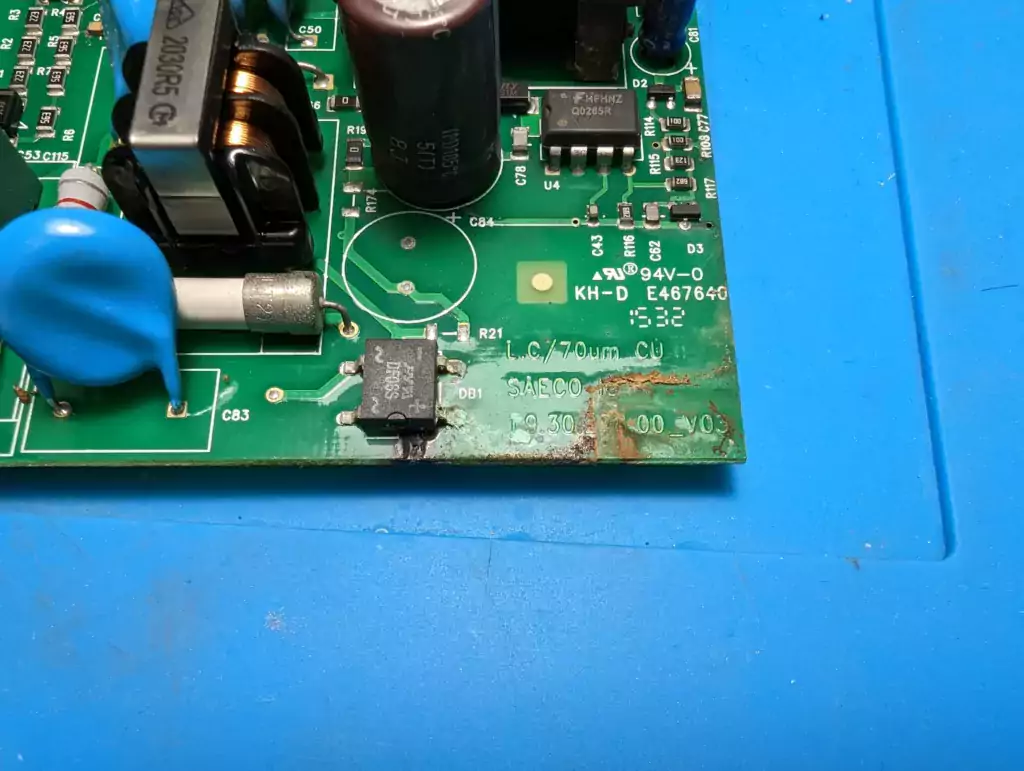
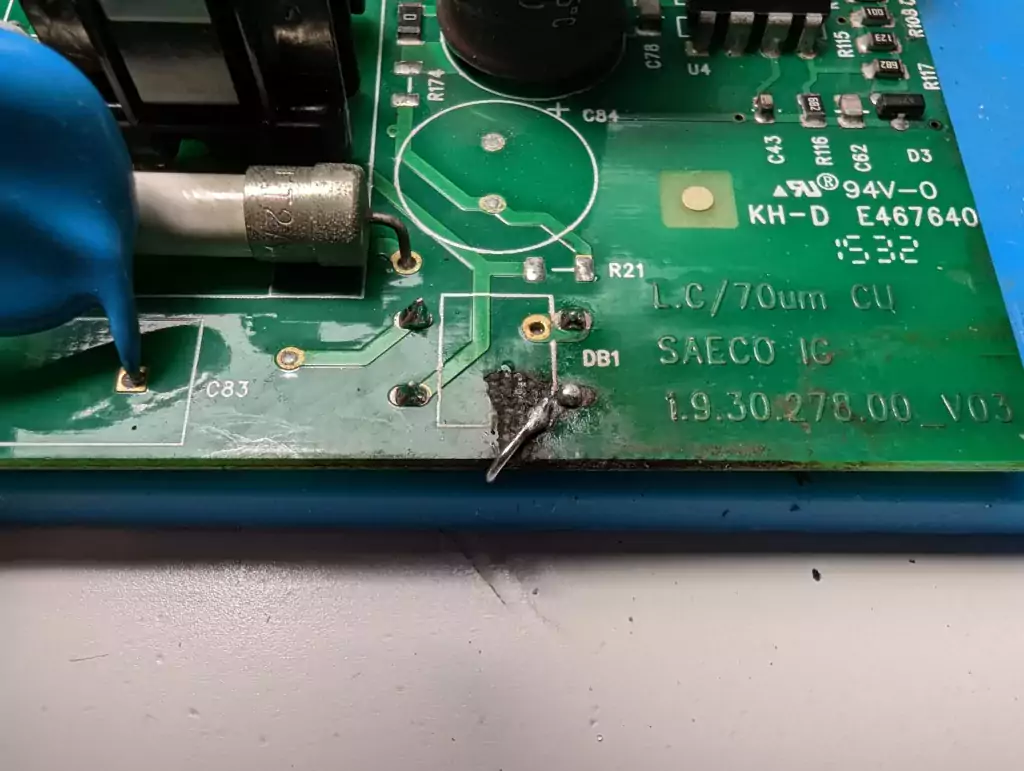
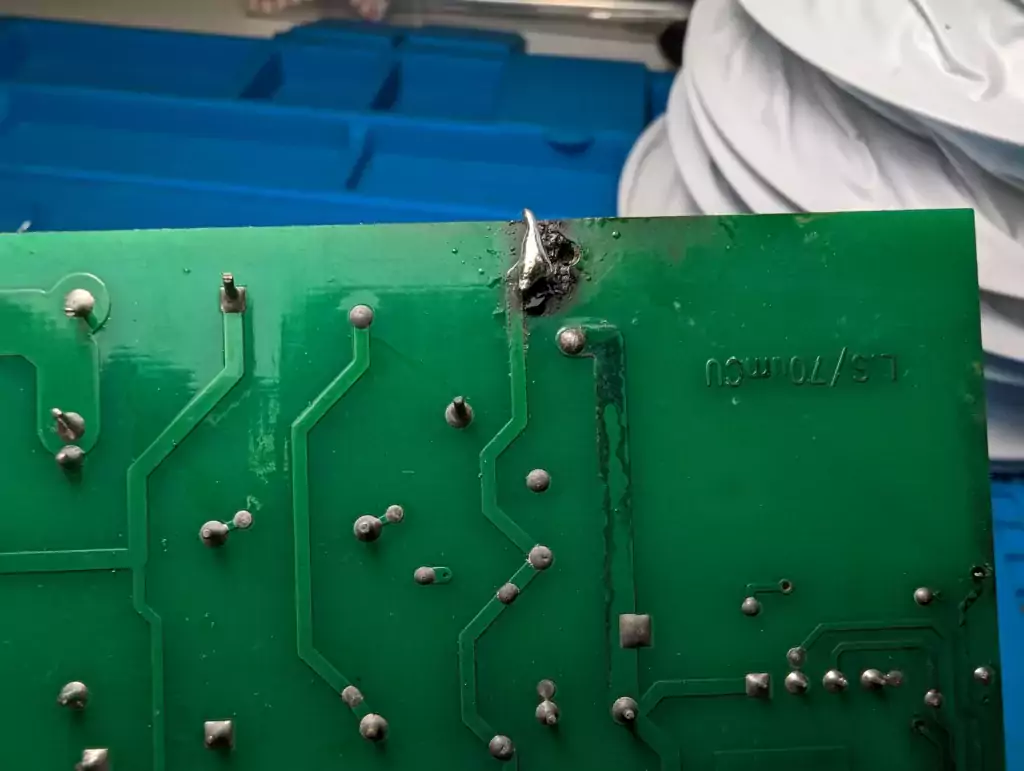
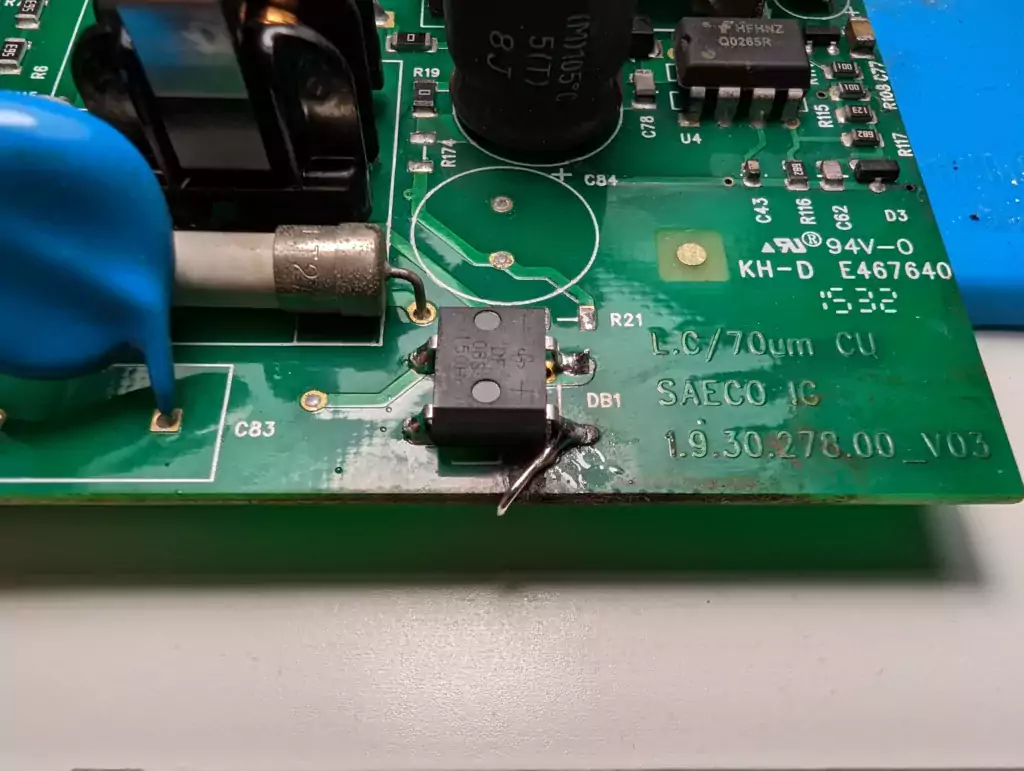
I removed the old rectifier using a hot air station. Afterward, I tried placing some solder on the remains of the connections. However, some old traces, especially the via, were burned to a crisp and wouldn’t take any solder. Luckily, Afterward the rectifier is right at the edge of the board, so I just… took a piece of solid wire, ran it around to the backside and attached it to the remains of the trace there.
Afterward, I put the replacement rectifier on the pre-tinned traces and used the hot air station again. After getting it to stick, I used the soldering iron on each leg separately to get some more tin onto the legs for a better connection.
The largest chore, however, was putting the entire thing back together — but thanks to this helpful YouTube video I managed to put it back together in one piece. And — it worked! The part itself cost €1.50 – a new board would’ve cost €100, and a new coffee machine about €500! I call this a success.
Deferred Maintenance & Upgrades
The coffee machine didn’t have the luxury of a consistent maintenance scheme. While the electronics worked again, there were still some issues caused by wear and tear from being used daily for nearly a decade.
Thankfully, Saeco seems to provide third-party resellers with any spare part imaginable — chapeau! There’s even tiny spare parts available where other manufacturers would only offer an entire kit for resale. The brewing unit, for example — an entire replacement costs around 60 bucks, but you can get spare parts for every subcomponent for just a few bucks each.
To give the coffee machine an entire overhaul, I ordered the following spare parts:
| Part | Part Number | Partner Link |
|---|---|---|
| Seal / O-ring for the piston of the brewing unit 0320-40 (silicone) | NM01.044 | 140325062 | 996530059406 | Amazon.de Amazon.com |
| Inlet nozzle (white) with O-ring | 996530009825 | 421945002571 | 421945002572 | Amazon.de Amazon.com |
| Crema valve with valve pin | ||
| Coffee spout for piston (V3) | 11009362 | 421944065222 | Amazon.de Amazon.com |
| Saeco seal maintenance kit O-rings for outlet valve | Amazon.de Amazon.com | |
| (Food Safe) Silicone Grease | Amazon.de Amazon.com |
I ended up replacing the water intake and extrusion from the brewing unit with more modern replacement parts — they changed the design of some parts throughout the sale of the device. Most importantly, I installed a replacement crema valve. This valve exists to withstand pressure within the brewing unit until the optimal brewing pressure is achieved, and then allows the extracted coffee to flow to the outlet.
The old version used a spring and a glass ball — pretty ingenious, actually. The newer version uses a spring and a plastic plunger of sorts, supposedly increasing the quality of the crema.
I did, however, fail to replace the o rings on the multi water inlet valve. The new o-rings on the plunger and coffee outlet valve as well as the new crema valve spring meant that the prior leaks had been closed, thus increasing the total system’s water pressure back to original levels. Water doing what it does best, it sought the weakest point in the system — the old o-rings on the multi water inlet valve — and completely failed. The system couldn’t even produce enough pressure to make any coffee anymore, and just dumped it all into the water tray.
Lubing the old o-rings didn’t help, so I ordered a set of replacement o-rings. After replacing those as well, the coffee machine is good as new! So my advice: Get the replacement parts in the gallery above, and your coffee machine is good as new and ready for many more years of service.
Thank you very much for providing this information. You included all the details I would have needed, but I wouldn’t have had the courage to tear into it without your guidance.
My coffee machine of the same model has developed an internal leak that I can’t pinpoint. So replacing all the O-rings sounds like a good sure-fire approach.
The Parts list that I found online does not include O-ring specification. How did you ever find the right ones?
Where is the leak? If it leaks into the tray, it’s likely one of the seals of the brewing unit or its connecting spouts that are leaking. Those are easily replaced, and you don’t even need to open the case.
If it’s inside, then yes, you need to open it up. It’s a chore, and I forgot to take more pictures to make the processes clearer. My advice is to check out the video I linked, it’s a dude on YouTube that fixes loads of super automatics like that. It’s a bit of a headache since it’s POV filmed, but it helped me when I got stuck.
As to the exact type of o-rings — I just bought seal-kits online that said they match my machine. I didn’t bother trying to purchase them separately, because I didn’t want to have to deal with the different types of o-rings, whether they’re food-safe and whatnot. I doubt there’s much money to be saved there either.
Another tip: Use a toothpick or something else to make the machine thing the door is closed, so you have an easier time seeing what’s going on while it runs.
I don’t have that type of coffee machine anymore, but if you need some advice, feel free to task — I’ll try my best to help.